Explorers have the opportunity to earn income and gain reputation by making pioneering jumps into unexplored systems, and gathering data on planets, stars and other points of interest within systems. Exploration data can be sold at the Universal Cartographics tab of Starport Services. The first player who sells information about a celestial body will be credited in-game with a "Discovered By" tag on the Galaxy Map.[1]
For example, one station may know about all the planets in a star system, but not have specific information on the planet surface. If you equip your ship with a surface scanner, you can then sell this complementary information for a small price. If you are able to explore a star system where no data has been reported before, and you collect all data on planet names and also surface information etc, then you will get a much bigger reward.
Galactic Records
The fansite Universal Cartographics has a records archive with details of record breaking stellar objects found by explorers in the galaxy of Elite: Dangerous. There are over 650 record categories posted by around 100 explorers. A Galactic Book of Records is available here.
Michael Brooks said on the morning of March 17, 2016 approximately 30,851,973 systems were explored by people. That's 0.0077% of the Milky Way galaxy.[2]
As of March 2, 2018 Commanders have discovered 112,863,791 individual star systems, which is only 0.028% of the systems in the galaxy.[3] Over 20,262,978,541 light-years have been hyperspaced since Elite Dangerous was released.[4]
Galactic Traffic Report
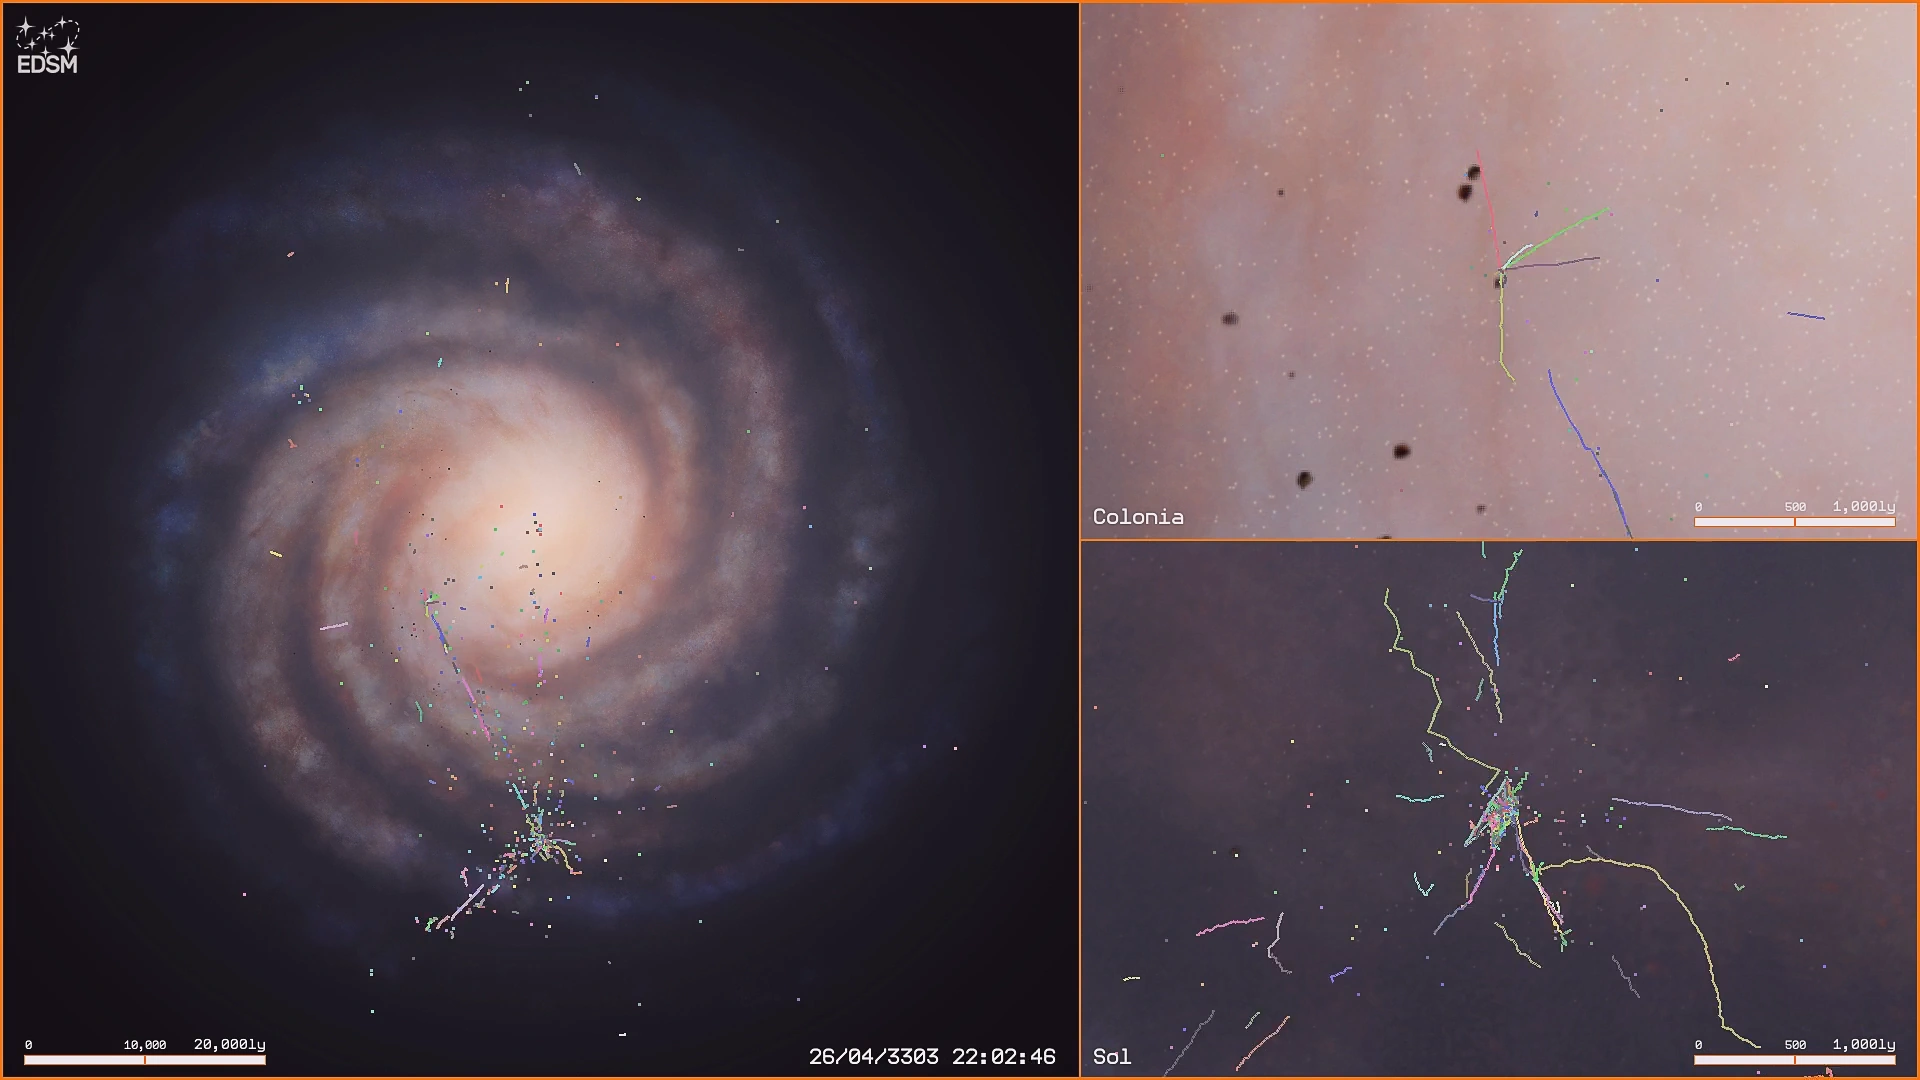

Galactic Traffic Report April 3303
EDSM made traffic report videos which show ship movement and exploration in the galaxy. It's based on data taken from EDSM flight logs. ED-Board made an Elite: Dangerous Heatmap timelapse generated from the edsm.net database (systems data submitted by E:D players) to show progress of the Milky Way exploration.
")
Equipment

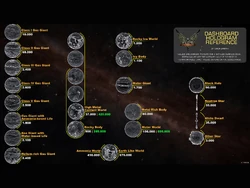
Dashboard Hologram Reference
Exploration is only possible with dedicated scanners. A Discovery Scanner is required equipment and the Detailed Surface Scanner is also important to make the most out of exploration.
Aside from this, the key attributes of an exploration ship are range and endurance. A Fuel Scoop is necessary if you are going on long trip out into the galaxy without any space station to refuel. Similarly, it is useful to upgrade your fuel tank to a larger model if possible. An A-rated Power Plant is almost essential for better heat efficiency while fuel scooping, but it is not always optimal to use the highest class. Compromises in power usage allow for fitting lighter power plants while retaining the heat efficiency. Having one or multiple Auto Field-Maintenance Units installed is extremely important when performing extremely long distance deep space exploring, as accidents do happen, and such accidents may, for example, damage the FSD, thrusters or life support modules, compromising your ship. An AFM fixes modules so critical damage is rare. Using the neutron highways also requires an AFM, since overcharging the drive in the stars' jet plumes damages the drive with each jump. One of the main hazards of exploring is close encounters with stars, so one or more Heat Sink Launchers may be helpful. It is best to keep only one launcher online and bound to a firegroup to avoid wasting them.
To increase your jump range, upgrade your Frame Shift Drive to one with A rating for best range. If possible, having an Engineer (Felicity Farseer is currently the best choice) optimize the drive will increase range significantly. Don't forget though that you can also increase range by removing unnecessary weight. Since pirates can attack even very far from civilized systems, it is advisable to retain all of your shielding (although this adds weight). Heavy weapons and other combat systems like scanners, hatch breakers, ECMs and interdictors should all be removed from the ship. Cargo Racks can be considered optional, though since version 1.4 it is now possible to encounter salvageable wreckage while out in deep space. Confirmed loot from this type of signal source includes small survey data cache, large survey data cache, and occupied cryopod. While small survey data cache sells for ~4500cr, large survey data cache and occupied cryopods can be quite valuable (up to and exceeding 100,000cr). Also, on very rare occasions, less than 1000 ly from Sol you can find artefacts, so having cargo racks can be profitable. The artefacts might be guarded by NPCs.
If you have access to planetary landing, install a Planetary Vehicle Hangar, and keep your shield generator, as it is near impossible to land on planets without taking hull damage, and the ability to collect materials for synthesis will allow you to replenish your AFMU as many times as you want.
Turn off the cargo hatch and sensors in the modules panel. This lowers heat generation, which is useful while scooping. Remember to also keep the AFMUs and depleted Heat Sink Launchers off when not using them, since this allows a smaller and lighter power plant to be used.
Other modules can also be engineered for maximum exploration comfort. These include:
- Power Plant: The Low Emissions Power Plant blueprint allows for more comfortable fuel scooping, albeit reducing available power.
- Thrusters: Clean Drive Tuning reduces the thermal load of thrusters, allowing more heat headroom.
- Weapons and Utilities: The Lightweight Mount blueprint can remove up to 75% of the mass of almost any weapon and utility module, minimizing their impact on jump range.
- Armour: The Heavy Duty Armour blueprint increases defences and hull integrity, but Lightweight Armour suffers no mass increase, thus greatly improving survivability during planetary landing.
- Shields: Reinforcing a lower class shield generator gives better shields at no mass penalty, also increasing survivability upon landing. This is superior over Enhanced, Low Power Shields.
- Power Distributor: If one wants to use a lower class power distributor with less mass while retaining the ability to boost, the Engine Focused Power Distributor blueprint can allow this.
Visit http://www.edshipyard.com or http://coriolis.io/ to get more info on ship customization and plan your loadouts well ahead.
Ships
While any ship can potentially be outfitted for exploration provided it has enough space for the requisite equipment, arguably the most important determinant for a ship's suitability for exploration aside from the modules it can fit is jump range. Any serious expedition beyond the human bubble will cover thousands or tens of thousands of light years, and longer jump ranges not only cut down travel times, but allow access to the greatest possible number of star systems.
For instance, traveling to Beagle Point and back is regarded as a major milestone that dedicated explorers should eventually strive for, but any ship restricted to a jump range of less than 34 ly will be unable to reach the system because it is located in an area where stars are considerably fewer and farther apart. Other stars in the galaxy can be even farther apart, and many are completely unreachable in the current state of the game even with an optimally-outfit ship.
Recommended exploration ships include:
| Ship | Max Jump Range as of 2.3 (Un-Engineered) |
Pros | Cons |
|---|---|---|---|
| Asp Explorer | 38.19 ly |
|
|
| Diamondback Explorer | 41.61 ly |
|
|
| Anaconda | 41.45 ly |
|
|
| Orca | 35.80 ly |
|
|
| Dolphin | 35.10 ly |
|
|
| Hauler | 37.29 ly |
|
|
Most other ships are markedly inferior for exploration purposes compared to those listed above, but some might be suitable alternatives either in the short-term when better ships are unaffordable, or for a change of pace. These alternatives are listed below, from greatest un-Engineered maximum jump range to lowest:
- Adder (32.96 ly)
- Asp Scout (31.47 ly)
- Type-6 Transporter (30.73 ly)
- Python (30.45 ly)
- Diamondback Scout (30.40 ly)
- Beluga Liner (29.82 ly)
- Cobra MkIII (28.55 ly)
Remember that the maximum ranges listed here don't include any modules, so outfitting the ship for exploration usually shaves off 4-6 ly from jump range. Far enough from civilized space NPCs are an extreme rarity and eager explorers can bin their weapons and other systems, such as shields, to get more jump range. You may also want to install systems of lesser class than your ship allows to save on weight. D-rating systems are the lightest in weight, adding to jump range.
The Engineers update introduced many ways to modify and optimize ships for exploration. Due to this, many ships previously incapable of large jumps are now very viable choices. The Python, for example, can achieve ranges in excess of 36 ly with a class 5 FSD enhancement, making it an adequate exploration ship; properly outfitted and modded, it can have the utility of an Anaconda with the dexterity of the Asp Explorer. Of course, normal exploration ships can be pushed to even greater ranges (~57 ly for the Asp Explorer, ~58 ly for the Anaconda, and ~62 ly for the Diamondback Explorer).
Rewards for exploring
Visual Guide to Exploration in 2.3
The value of exploration data depends on several factors:
- The quality of the data. Some small value (~500CR) simply for locating the object with a Discovery Scanner, sometimes called "honking" because of the sound the scanner makes. The quality of the Discovery Scanner does not impact the value of objects discovered in this way, but merely the max distance at which bodies can be revealed. However, much more value is obtained by moving inside the max scan range (planets approx 1-1000 ls, stars approx 500-12000 ls) of the body with a Detailed Surface Scanner equipped, targetting the body, and letting a scan complete.
- The nature of the celestial object. The most valuable planets are earthlike worlds (ELWs), water worlds (WWs), and ammonia worlds (AWs). The most valuable stars are black holes (BH) and neutron stars (NS). The least valuable planets are rocky, icy, and rocky icy bodies, which are sometimes referred to as a whole as "rice".
- Terraformability. Planets located within the circumstellar habitable zone ("Goldilocks zone") around their parent star are candidates for terraforming and gain a value multiplier. Only water worlds (~2x), high metal content (~6x), and rocky worlds (~3x) can be candidates for terraforming.
- The mass of the celestial object. Aside from body class and terraformability, it is the only property of the body that matters for valuation. More massive objects are always worth more than less massive objects within that particular body class, ignoring terraformability. E.g., a 2.00 Earth-mass high metal content body will always be worth more than a 1.00 Earth-mass high metal content body, though it will still be worth less than a 1.00 Earth-mass Earthlike world.
- First sale bonus. A further 50% bonus is applied if you are the first commander to scan the celestial object with a Detailed Surface Scanner. Additionally, the body will gain a "First discovered by" tag and your commander name will be visible to all players when the body is selected or hovered over in the system map. Note: the body's name will still show as "Unknown" to any player who has not scanned it personally.
There are many factors which have no effect whatsoever on the value of a scanned body's exploration data:
- Distance from sale point. Note you can't sell data at stations within 20 ly from its source.
- Distinct visual features. Coloration, craters, canyons, mountain ranges, etc.
- Material content. No bonuses are given for the presence or quantity of specific materials.
- Landability. Both landable and non-landable bodies have the same value.
- Orbital properties. Distance from arrival point, rotational period, semi-major axis, eccentricity, inclination, arg of periapsis, or orbital period.
- Stellar properties. Stellar mass, absolute magnitude, age, radius, rotation and surface temperature.
- Planetary properties. Radius, rotation, surface temperature, atmosphere, volcanism, and surface pressure.
| Body Type | Approx Value (SM = Stellar Masses, EM = Earth Masses) | ||
|---|---|---|---|
| Star Class | Tiny | Medium | Massive |
| Class O | 3,677 cr (18.32 SM) |
4,170 cr (29.67 SM) |
4,464 cr (36.42 SM) |
| Class B | 2,992 cr (2.58 SM) |
3,098 cr (5.02 SM) |
3,456 cr (13.24 SM) |
| Class A | 2,938 cr (1.33 SM) |
2,950 cr (1.60 SM) |
2,986 cr (2.43 SM) |
| Class F | 2,915 cr (0.80 SM) |
2,932 cr (1.19 SM) |
2,957 cr (1.78 SM) |
| Class G | 2,912 cr (0.74 SM) |
2,923 cr (1.00 SM) |
2,935 cr (1.26 SM) |
| Class K | 2,898 cr (0.42 SM) |
2,911 cr (0.71 SM) |
2,923 cr (1.00 SM) |
| Class M | 2,887 cr (0.16 SM) |
2,896 cr (0.37 SM) |
2,905 cr (0.57 SM) |
| Class L | 2,884 cr (0.08 SM) |
2,887 cr (0.15 SM) |
2,890 cr (0.22 SM) |
| Class T | 2,881 cr (0.03 SM) |
2,883 cr (0.07 SM) |
2,885 cr (0.11 SM) |
| Class Y | 2,880 cr (0.01 SM) |
2,881 cr (0.02 SM) |
2,882 cr (0.04 SM) |
| Class MS | 2,934 cr
(1.25 SM) |
||
| Wolf-Rayet (Class WO) |
7,794 cr (113.02 SM) |
||
| Black Hole (Class H) |
44,749 cr (2.73 SM) |
61,439 cr (28.42 SM) |
80,304 cr (57.48 SM) |
| Neutron Star (Class N) |
43,276 cr (0.43 SM) |
43,441 cr (0.69 SM) |
44,619 cr (2.50 SM) |
| White Dwarf (Classes DA, DAB, DAV, DAZ, DB, DBV, DC, DCV, DQ) |
25,000 - 27,000 cr (approx) | ||
| Carbon Star (Class CN) |
2,920 cr (0.93 SM) |
||
| T-Tauri (Class TTS) |
2,881 cr (0.01 SM) |
2,900 cr (0.47 SM) |
2,922 cr (0.97 SM) |
| Planets & Moons | Tiny | Medium | Massive |
| Belt Cluster / Planetary Ring | 0 cr | ||
| Class I Gas Giant | 2,472 cr (2.30 EM) |
3,400 cr (62.93 EM) |
4,514 cr (620.81 EM) |
| Class II Gas Giant | 8,110 cr (5.37 EM) |
12,319 cr (260.84 EM) |
14,618 cr (949.98 EM) |
| Class III Gas Giant | 1,368 cr (10.16 EM) |
2,339 cr (990.92 EM) |
2,731 cr (2,926 EM) |
| Class IV Gas Giant | 2,739 cr (2984 EM) |
2,782 cr (3,319 EM) |
2,827 cr (3,697 EM) |
| Class V Gas Giant | 2,225 cr (688.20 EM) |
||
| Water Giant | |||
| Helium-Rich Gas Giant | |||
| Rocky/Icy/Rocky Ice Planets | 792 cr (0.0001 EM) |
933 cr (0.04 EM) |
1,720 cr (89.17 EM) |
| Rocky Planets (terraformable) | 36,000 - 37,000 CR (approx) | ||
| High Metal Content Planets | 4,966 cr (0.0015 EM) |
6,670 cr (0.41 EM) |
9,632 cr (31.52 EM) |
| High Metal Content Planets (terraformable) | 36,000 - 54,000 CR (approx) | ||
| Metal-Rich Planets | 9,145 cr (0.0002 EM) |
12,449 cr (0.51 EM) |
14,562 cr (4.03 EM) |
| Metal Rich Planets (terraformable) | |||
| Water World | 26,589 cr (0.09 EM) |
30,492 cr (0.82 EM) |
43,437 cr (42.77 EM) |
| Water World (terraformable) | 32,000 - 78,000 CR (approx) | ||
| Ammonia World | 37,019 cr (0.09 EM) |
40,322 cr (0.41 EM) |
71,885 cr (196.60 EM) |
| Earth-like World | 65,000 cr (0.24 EM) |
67,798 cr (0.47 EM) |
77,700 cr (2.68 EM) |
Ranks


Rank Promotion animation
The player may gain exploration ranks with The Pilots Federation based upon the amount of money made by selling cartographic data acquired in exploration to Universal Cartographics.[nb 2][nb 3]
Exploration progression can also be gained by driving an SRV (the further from Sol you are, the quicker you gain progression this way), and by collecting materials on the surface of a planet or moon, with a significant bonus the first time you discover a material.[5]
Profit required for a given rank as of v2.3 (confirmation required)
| Rank | Profit Required |
|---|---|
| Aimless | 0 |
| Mostly Aimless | 40,000 |
| Scout | 270,000 |
| Surveyor | 1,140,000 |
| Trailblazer | <4,000,000 |
| Pathfinder | 10,000,000 |
| Ranger | 35,000,000 |
| Pioneer | 116,000,000 |
| Elite | <318,000,000 |
Tips for Exploring


Explorer in the Heart and Soul nebulae
Pay close attention to your destination systems in the Galaxy Map. The best systems are those capable of supporting habitable planets, which are classes F, G and K - that is to say, the most Sol-like systems. A-class stars can also have habitable planets, however this is much less likely. Classes O and B are almost always too young and hot to have good planets to explore, while classes L and M and below are very cool so where they have planets, they are likely to be low value ice and rock-ice worlds. Multiple systems are a risky bet - firstly they may be less likely to have planets - and if they do, they may be a long distance away. Black holes and neutron stars, however, do net quite the amount of credits, especially if you are the first to discover them. Herbig and T Tauri-type stars almost never have anything more than occasional gas planets.
Fuel Scooping
Bear in mind how well a destination star will fare with your Fuel Scoop. Cooler stars are easier to scoop fuel from without overheating, while classes F and above can be dangerously hot. Fuel scooping will only work with main sequence stars; these are stars with the stellar types O, B, A, F, G, K and M. Astronomers often use the mnemonic "Oh Be A Fine Girl/Guy, Kiss Me" to remember the main sequence stellar classes in order of temperature. Some commanders use the phrase "KGB-FOAM".[6]
In many systems (particularly smaller, cooler ones) it is possible to combine scanning and fuel-scooping. Simply submerge yourself in the stellar gases and start to scoop, allowing a healthy margin of safety (e.g. keeping yourself at ~60% heat). Then you can scan nearby objects up to ~50 while your tanks are refilling. Scanning works uninterrupted even through stars, so remaining stationary while scooping is completely viable.
Terraformable Planets
Identifying terraformable planets, which are the most valuable, is important. You can look at the system map as soon as you have fired your Discovery Scanner upon entering a system, which will show images of all stars and planets in the system. All planets have a distinctive sound that plays while hovering over them. This can help you identify good prospects. Potential candidates are brown or blue with rich surface features, even clouds, while featureless white disks are typically ice worlds of little value.
Earth-likes and water worlds are quite obvious on the system map, especially if listening to the sound they make. Terraformables, however, do not differ from normal planets at first glance, so they need to be scanned. The mass of the planets and distance from the star are the next key factors. The size of Mars is approximately the low boundary of terraformability, which is half the radius of Earth and tenth its mass. Next, pay attention to the size of the star and the distance of candidate planets and try to work out whether they are in the habitable zone of the star. This is approximately 1AU for stars of 1 solar mass, and can be determined for other stars using the inverse-square law. For example, for a star of 2 solar masses, it's the square root of 2, or ~1.4AU. Many terraformable metal planets may seem worthless at first glance, but if their temperature is right, they are potential candidates.
Other factors are often negligible: even an atmosphereless planet can be a candidate. Temperatures between 250K and 300K are most ideal, however there are extremes. Water worlds, for example, which are somewhat valuable themselves even if not terraformable, can be ridiculously hot at over 600K. This is often compensated by their atmospheric pressure, which can reach over 1000 atm. Gas planets have all similar value, regardless of whether they have life or not.
Non-Sequence Objects
It is possible to discover non-sequence objects by turning off all star types in the map. Look for shadowy dots in the galaxy, zoom to them and turn on the star types to set a course. Usually you'll find a black hole in the system. Black holes also stand out in Realistic mode.
Asteroid Bases
Dozens of Asteroid Bases are located in deep space. They provide resupply and repair services. So you can get your ship hull repaired there without needing to travel back to the bubble.
Notes
Videos
")
")
")
")
")
Gallery
")
")
")
")
")